Happy Halloween!
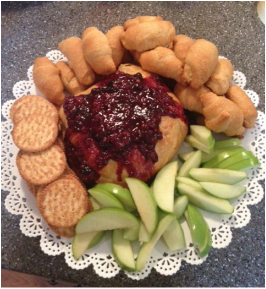
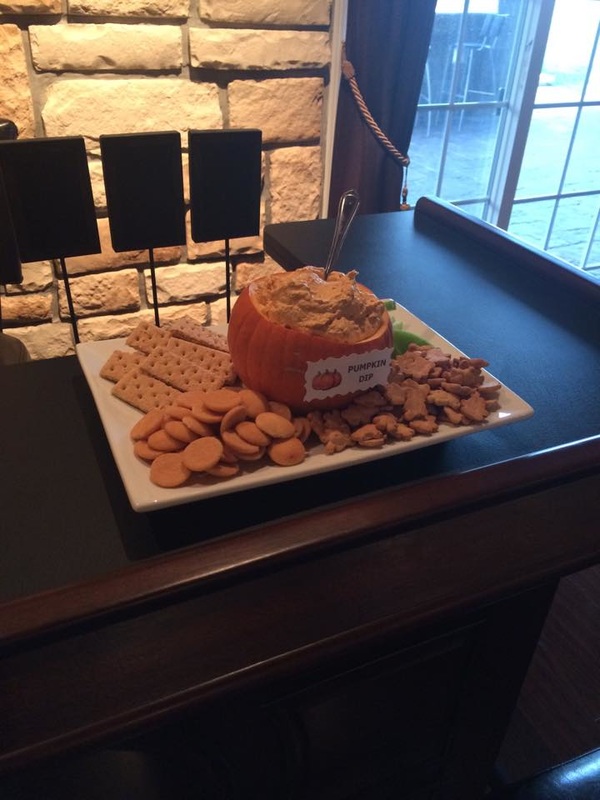
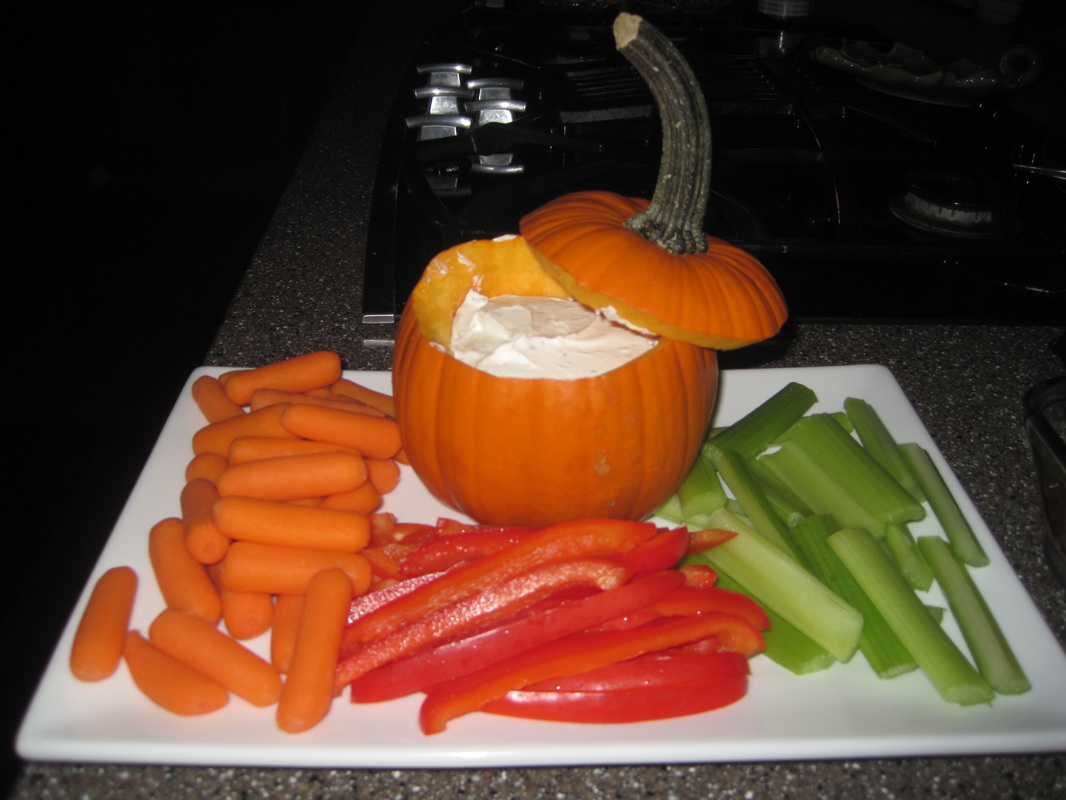
If you're looking for some last minute Halloween desserts, here are some easy/delicious ideas! Pumpkin Pie Dip (surprisingly good, even for people who aren't crazy about pumpkin pie!), dipped Oreos, candy corn cookies, and for a healthier alternative - apple teeth (looks kinda gross, but the kids think they're hilarious). 
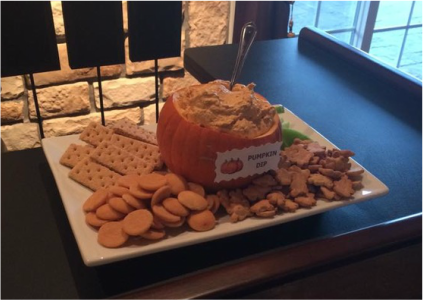
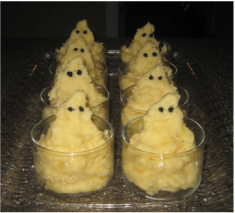
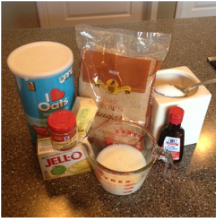
The recipe for this is so simple: Mix together one 15oz can pumpkin, one 3.4oz package of instant vanilla pudding, and 1tsp of Pumpkin Pie Spice. Stir in one 8oz tub of Cool Whip until blended. Refrigerate for at least one hour to chill. - Yep, that's it! It can be served with so many things - cookies, apple slices, graham crackers, Nilla wafers, etc. So delicious! 
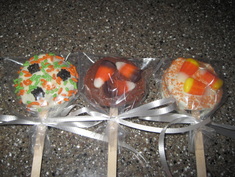
My kiddos are also obsessed with dipped Oreos this time of year and it's a great project to make with them! Open up your Oreo and put some type of stick in there (popsicle stick, sucker stick, etc) - I like to use a little extra melted chocolate or frosting like glue to make the Oreo stick back together better. Melt some candy melts or some chocolate in the microwave and then dip your Oreo until fully covered. Decorate and let dry (you can either do this on wax paper or I like to just stand them upright in a cup). You can individually wrap them for a party, keep them open for a dessert tray, or even make a bouquet out of them. :) 
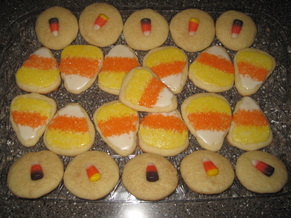
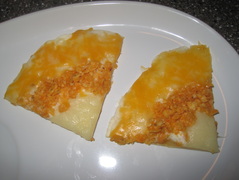
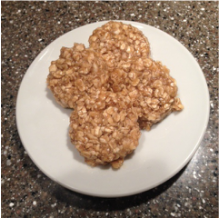
Decorated cookies are always a go-to for me if I'm short on time. You can mold your sugar cookie dough into a candy corn shape and then decorate with yellow, orange, and white - or simply use candy corns to decorate cinnamon sugar snickerdoodles! 
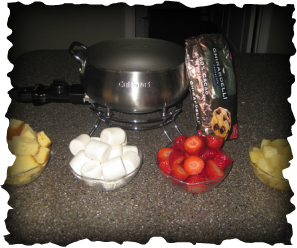
These kind of creep me out, but the kiddos love them and they are a decent alternative for a "healthier" treat if you want to scale back the sugar a bit. Just take apple slices, spread with peanut butter, and put some mini-marshmallows in as teeth. The kids will eat these up!
Happy Halloween!
0 Comments
If you're looking for a fun dinner party idea, try a fondue party! There's something about this cold weather moving in that makes me so excited for this kind of a meal - warm, gooey cheese... things (anything!) dipped in warm milk chocolate... It's a great "social" meal, and with the right options, it's great for a diverse group of people! You can cook meats in oil if you enjoy that, but for us, we like to simplify it (especially for people who aren't familiar with fondue!) so we cook all the meats and provide a bunch of different dipping sauces, along with a traditional cheese fondue (with green apples and sourdough bread... Mmmm). The electric fondue pots are SO much easier than the flame ones, but either will work. For the cheese fondue, there are SO many recipes out there you can create - but honestly I love the pre-made packages you can buy in your grocery store cheese section (and they freeze incredibly well, so you can stockpile them when they're on sale and then pull them out as needed! :)
One of my favorite desserts: chocolate fondue. This is such a great party food because it's fun, kids love it, and there are so many options. So any time a holiday rolls around I am obsessed with making themed food, whether it's a simple dinner for my family or something for a party. Halloween is no exception. There are a lot of "creepy" elaborate dishes I've seen, but as you may have noticed from my blog, I like to keep things pretty simple and easy (but fun and theme-worthy all at the same time, of course!) Here are some really simple/fun foods to make for this upcoming holiday! First off, any food looks good in a pumpkin - so that's always a go-to for presentation if I'm preparing a dish to take somewhere. You can put ranch dip in there and serve with veggies, hummus inside served with pita chips and crackers, or even make a delicious pumpkin pie dip for apples and graham crackers (see prior blog post about my Fall Tasting Party for that recipe!) Other fun ideas include Jack-o-Lantern Sliders (the kids LOVE these) - simply take a knife tip and carve different faces into a slice of cheese. Also "candy corn quesadillas" are so much fun - I used yellow cheese for the top, crushed Doritos for the orange middle, and white cheese for the tip (you can load the inside of the quesadilla with beef, chicken, etc). These mashed potato ghosts and mummy dogs are also big hits! I just formed the mashed potatoes into a ghost-like positioning and then used a little black food paste and a toothpick to make the eyes (you could also use a piece of olive or a cut up black bean or something for the eyes). The mummy dogs couldn't be easier too, just take crescent roll dough, wrap it around a hot dog, bake, then dot on some ketchup eyes! (Or make them more gruesome with extra ketchup - depending on the ages of your kids!)
These are easy & fun ways to spruce up food you already eat to make the holiday a little more fun for the kiddos. Halloween desserts will be posted next week, woot woot! Come back! :) So it's that time of year again for all things pumpkin - although I have to confess *gasp* I absolutely HATE pumpkin pie. (Yeah, it's almost un-American, right?) But I am loving pumpkin flavoring in a multitude of other recipes, and this one is a big hit in my family - no-bake pumpkin cookies! This recipe is so easy to make and there aren't too many ingredients. And you don't have to use your oven either (no risk of burning anything!) so it's pretty simple! Here are all of the ingredients: Looks easy so far, right? The entire process takes about 10-15 minutes - then you just need to let them cool (though I like them hot and gooey when they first come out!). To start, mix together the butter, sugars, and milk in a sauce pan - boil for 2 minutes. Then stir in your pudding, pumpkin pie spice, vanilla and oatmeal - let stand for 5 minutes. Then scoop out onto wax paper and let them cool! See, told you that was easy! The nice thing about these is that the pumpkin flavor isn't overpowering, so people who aren't obsessed with pumpkin spice will probably still love these! And another bonus - they freeze incredibly well, so you can make a double batch and then thaw some later for another round! :)
So it's already that time of year where I start panicking about holiday gifts. Seriously, I see one stupid meme on Facebook that says something like "only 9 Fridays left until Christmas!" and then I start to panic - within 2 hours I've charged up my Amazon account with nonsense and I'm scouring for inexpensive gift ideas for all those non-family people we gift to (my kids' wonderful teachers, for example). Now let me start by saying I take the easy way out and I give people (like those teachers) copies of my romance books for Christmas. Shameful, right? BUT, to make that seem more awesome, I make them up gift baskets. I LOVE gift baskets because they're easy to personalize and you can customize them however you want - but it can be hard to keep them within a reasonable budget. I'm always looking for ways I can add to those baskets without spending a fortune, and here's a great project to do just that: DIY coasters. This is such a fun, simple DIY project - and each coaster costs less than .25 cents to make - yes, seriously. Plus, you're simply using scrapbook paper for the design, so your color/style options are endless. You can make 4 of the same coasters for a set, or use 4 different coordinating papers. Or give them individually with coordinating mugs and tea/coffee. Or you can even print out photos on paper and use those instead of pretty scrapbook prints for Grandma and Grandpa - so many options! Here's all you need for the project: See, I told you it was easy! Just a 4x4" tile (.13 cents each at Home Depot!), scrapbook paper from a craft store cut into 4x4" squares (so you can make 9 coasters out of just ONE piece of 12"x12" paper!), a sponge brush, Mod Podge (this size was about $4, but they sell smaller bottles of it at the dollar store if this is the only project you plan to use it for) and something for the bottom of the coaster, i.e., cork, felt pads, etc. I like using furniture pads (which you also get a large pack of from the dollar store, along with superglue that adheres to very porous surfaces!) Here's the process: Spread a layer of Mod Podge on the back of your scrapbook paper and adhere it to the tile (make sure you smooth out the paper once it's set on the tile so you don't have any bubbles underneath). I would advise doing this on a counter or plastic placemat or something since you may get some Mod Podge on your working surface (though it does wash off easily with warm water). Let it dry for a bit, probably 10 minutes to be safe. Then spread another layer of Mod Podge across the top of your paper. Let it dry and repeat. Once it's dry, add your felt or cork to the bottom of the coaster so it will slid smoothly on a table. Once dry, you may want to spray them with a clear top coat lacquer (only a few bucks in the paint section - this will protect the Mod Podge from mugs that are really hot). Then wrap up with ribbon or twine for a gift! See, easy! And cheap! And actually really fun to make! :) You can then give these coaster sets out with Starbucks gift cards, cute coffee mugs, baskets with my romance books in them (<-- see my sales page to purchase - yes, another shameful plug!) and other fun personable goodies to make a complete package! You can even make the coasters using holiday paper if you want some to decorate your own house with! So remember, only 70 days left til Christmas - start getting crafty!! :)
If you're looking for a new appetizer to try for fall, I am going to HIGHLY recommend this one. It's extremely easy to make with only a few ingredients, and it is SO tasty! The instructions are very simple - preheat your over to 375. Take a wheel of brie cheese and wrap it in a thawed puff pastry sheet (you can find those in the freezer section at the grocery store, usually by the Cool Whip). Set it on a baking tray and brush lightly with a beaten egg. Bake for 20-25 minutes until it turns golden brown.
For the fruit compote topping, your options are endless - I used berries since I had some fresh ones in the fridge, but you can also use frozen fruit for this. Put 1 cup of fruit into a sauce pan and stir, mashing it as you go. You can also sprinkle in some sugar or some honey or even a little bit of fruit juice for sweetness (my berries seemed to have enough liquid in them, so I didn't want any more juice for mine) - I added a sprinkle of brown sugar to the mix as well. Mash/boil for about 5-7 minutes until the consistency is like a nice jam. Pull your brie pastry out of the oven and top with the fruit compote. Serve with apples, crackers, toast wedges, mini croissants, etc. Make sure you put a serving knife on your dish to cut into the brie. It is pretty gooey when it's hot, but the way it spreads all over a cracker or bread of some sort..... Mmmm! And this recipe is virtually fool-proof (which is why it quickly makes my 'favorites' list) and it only takes about a half hour, start to finish. And the presentation looks nice too, which is a bonus when you're taking it to someone's house for a get together. :) As you've probably noticed from my blog so far, I tend to have a lot of gatherings at my house - birthday parties, movie parties, dinner parties, completely made up parties, etc. It's just fun. And I like food. And eating awesome food with other people makes life even more awesome. Trifles are one of my favorite go-to desserts - mainly because they're easy, you can make them ahead of time (or not, if you have little notice), and I typically have all the ingredients for SOME kind of trifle already in my house. They're pretty forgiving too - there are endless combinations for these. Now my personal "loose" definition of a trifle is simply layers of things I like all crammed into a bowl - then repeat. Yes, little layers of awesomeness. Now perhaps you've seen typical big trifle bowls where the entire dessert is in one dish - that's all fine and good too. But I've found that it's more fun to make them in small, individual serving sizes, that way you can make several different options at once. So, here's the gist of it: You need to start with a "base" ingredient (think of it kind of like a crust that will get soft and gooey once other layers are spread over top). For fruit-based trifles I like to use broken graham crackers, Nilla Wafer cookies, or angle food cake. For other recipes, I like to use broken cookies or brownie chunks. Mmmmm. So break up your "base" into bite-sized pieces and put into the bottom of your dish. Next - layer with pudding and/or cool whip (to soak into your base a bit) and then layer in your topping (I used strawberries for this one - kind of like a strawberry shortcake). Then repeat your layers with more pudding/cool whip and more fruit. Then top with some of your crushed up base (or cinnamon, sprinkles, whatever will complement your trifle) and then chill in the fridge until you're ready to eat them! (And yes, these can even be made the day before and they still taste great! :)
Other recipe combinations I love: chocolate chip cookies covered in chocolate pudding, cool whip, cookie dough bites, chocolate fudge sauce, then repeat. Another favorite: brownie chunks for the base, chocolate pudding, cool whip, chocolate syrup (you can never go wrong with a layer of that!) then repeat. You can also make a pumpkin flavored one for fall - graham crackers/Nilla Wafers for your base, pumpkin pie pudding (yes, they sell boxes of that in stores!), cool whip, more Nilla Wafer cookies (even Scooby Snacks are surprisingly good in these) and repeat. I also like banana cream pie versions - graham crackers or Nilla Wafers, vanilla pudding, sliced up bananas, repeat. See how easy and fun this is?! The combinations are endless - and if you're out of an ingredient, you can probably substitute something else for it. Also, this is a great dessert to go "light" on - you can use fat-free pudding and cool whip and they still taste great with less calories! So if you ever need an easy, fun dessert for any type of party (even made up parties like the ones I throw!) you should give these a try - I've never had a bad one! :) "Rachel, you weren't supposed to put beef in the trifle!" (<-- "Friends" reference anyone? :) Football season is a busy time in my house, and it seems like we are constantly feeding people. Of course most of the time I am well planned out with a delectable football menu - apps, sides, desserts, you name it. But, since football is on like 9 days a week (it at least feels like that, right?!) it seems like even when we don't have "plans" for a football party, our house turns into one anyway. SO, football staples to the rescue - here are the top 10 foods I have in my house/fridge/pantry/freezer at all times during football season (and they all have hearty expiration dates (just watch those crescent roll dates), so nothing goes bad if you don't use it right away!). I can do wonders with these 10 things: 1) Cheese (shredded, slices, anything...) 2) Frozen Meatballs 3) Crescent rolls 4) Cream cheese 5) Frozen slider buns 6) Pizza sauce 7) Tortillas 8) Salsa 9) BBQ sauce 10) Tortilla chips I can literally make magic out of the above ingredients. Sometimes I have other things in my fridge/pantry to enhance/compliment these items, and sometimes I don't - but either way, I can pull off some good football food with the above listed foods. Here are some ideas: Cheese - probably the #1 food staple I have in my house at all times. For football parties, I always make some kind of dip: And yes - that is a football-shaped crock pot. I told you I'm serious about this, right?! So as long as you have a bag of shredded cheddar, you're good to go - mix in an 8oz block of cream cheese (also on the must-have list for so many reasons!) and some diced bacon/green onions for a "loaded cheese dip." Or throw in the cheddar with some canned shredded chicken, cream cheese, ranch dressing, and Frank's Red Hot for some Buffalo Chicken Dip. Or simply mix the cheddar, cream cheese, and a can of chili without beans - you literally can't go wrong mixing together shredded cheese and cream cheese in a crock pot - even if you just add some salsa for additional flavoring, you have a winning dip. Mmm... And if the unthinkable happens and you run out of shredded cheddar? Take your block of cream cheese and pour salsa over the top and serve cold with tortilla chips - it tastes AMAZING and is so simple. Frozen meatballs - the reason I love these so much is because you don't have to waste time thawing them. Just dump them in a crock pot with some sauce (I love just mixing ketchup, brown sugar, and a little BBQ sauce together) and let them cook. OR, you can also throw them in the microwave for a few minutes if you're short on time with your sauce, and then throw them in a crock pot after they're heated to keep them warm. I love using these for meatball sliders (see above pic!) - simply put some saucy meatballs on some slider buns (or use Hawaiian rolls, those are my favorite!) and melt some cheese over them in the oven for about 10 minutes at 350. This takes less than 10 minutes to prep and they are SO cute and delicious. Crescent rolls - I use these for last minute pigs in a blanket, calzones or pizza rolls (just spread on some pizza sauce and cheese, then roll up and bake) or even for cold veggie pizzas with a cream cheese/ranch base. You can also stuff some of your cheese dip inside (like Buffalo Chicken Dip!) and roll them up and bake, either cutting them into pinwheels, or keeping them in their crescent shape (serve with some extra pizza sauce for dipping!): Tortillas are another love of mine for impromptu get togethers. You can whip up some quesadillas (again, cheese to the rescue!) and serve them in bite-sized triangles with salsa. You can also make wraps and pinwheels with them if you have any meat/veggies laying around. For impromptu desserts, I totally cheat - I use foods in my panty and just make them look like football-themed delicacies. I'm also a fan of trifles (<-my fancy version of just shoving pre-made sweets or fruit in a bowl with some pudding/cool whip - repeat for fancy layers, and poof - awesome dessert). In the pic below, these are just pre-made brownie bites, oatmeal cream pies (yes, the ones that cost like $1.25 for a box of 12!) and some Rice Krispie treats (from a package - I always have these in my pantry for emergencies!) and a little frosting on top for the theme. So there you go, impromptu football parties made easy! (And if you have any lactose intolerant guests, just apologize for all the cheese and point them to the chips and salsa... :)
I absolutely LOVE tasting parties - it's a great theme for a girls night or a couples get together and you can make it as easy or complex as you'd like, either by providing all of the food yourself, or asking each guest to bring an item related to your theme. Since it's officially fall, here are the highlights from my own Fall Tasting Party! The idea is simple - I hosted a girls night in and featured all of my favorite "fall" recipes. Everyone got to taste each dish (appetizers, beverages, main course entrees, and desserts!) and then everyone got to take home a recipe book with instructions on how to recreate everything they just ate! The idea is to make an assortment of dishes - I had dips, casseroles, hand held appetizers, wassail to sip on (along with wine, of course!) - that way it's more eclectic than just a normal meal. Here are a few pictures from the event: The girls enjoyed trying some new things that I consider to be staples in my fall menu, and it even encouraged me to try a few new things as well (the pumpkin no-bake cookies are going to change your life, I swear!). So gather up your own favorite fall recipes (or feel free to rip off all of mine - there's a PDF below if you want to just print these out, cut them into recipe cards, and make your own books) and start tasting fall... :)
|
AuthorI love writing romance novels, editing other people's novels, planning parties (heavy on the theme food!) and watching movies. Cooking has also become a passion of mine (because you can't have a proper party without food!) and I love finding new hobbies when I can squeeze them in. Archives
December 2020
Categories |