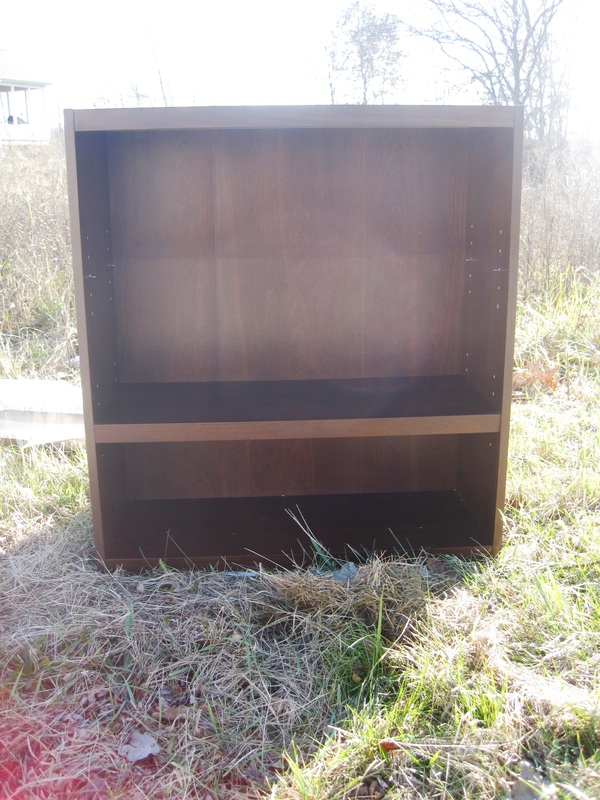
I love having a "project" to do, especially when it involves an idea that is both cheap and functional. My daughter was given two giant bags of "dress-up clothes" - great for her, but a clutter nightmare for me. We tried "bins" first - but of course when a girl needs to find that dress, that means everything just gets dumped on the floor. Cutesy child wardrobe armoires are really expensive, and totally not worth it to me. So, after some internet searching, I decided just to make something simple myself. Total cost: $20. Yep - and I even sprung for the "expensive" tension rod because I didn't think the $3 one would hold up. 
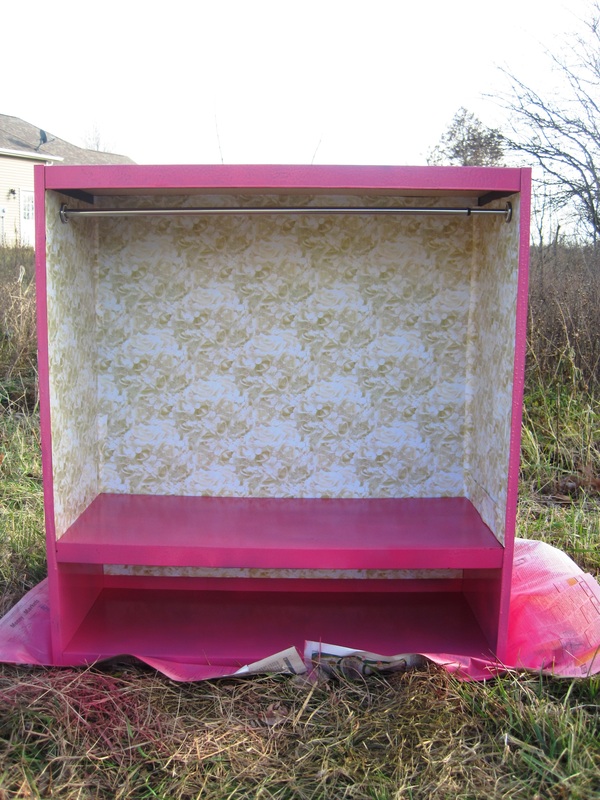
The process was very simple. I bought a small bookcase from a discount store and removed a shelf - I think they were $12, but I asked if I could just have the floor model for $10 and they gave it to me (which means I didn't have to build it - see what I did there... :) One can of pink spray paint (I painted it in a field - I don't trust myself with paint near a house) - I had some old wedding wrapping paper and lined the inside (but you could also just spray it too) - then I simply just hung up the tension rod and that was it. I almost took out the bottom shelf, but I left it in because that's where the dress-up shoes are stored. Since some of the dresses are long (like the one in this pic) I actually use hangers with clips on them to hang up the bottoms of the dresses - it keeps them nice and tidy that way. Two bins sit on top with the accessories (you know, tiaras and such) and I eventually put several command hooks on each side of the unit for purses and necklaces. This was such an easy, fast project and it has held up quiet well!
0 Comments
This was such a fun party theme for a little boy's birthday. The menu was a Mexican theme so the kids could wrap up their food in a 'spaceship' (tortilla!) and we also had other side items "rocket dogs" (pigs in a blanket), fruit skewer sprockets, etc. One of my favorite elements of the party - the robot costumes I made. The kids had so much fun dressing up in them, and they were EASY (you just need some boxes, wrapping paper, and some foil). Look at these happy faces! For decorations I made a few more robots for the food tables out of various tissue boxes, shoe boxes, and paper towel tubes, and also stuck some flowers in some decorated empty tissue boxes for centerpieces. It was really easy, and it was nice to be able to just recycle/throw everything away after the party! The party favors were inexpensive as well - we just decorated candy machines from the dollar store and turned them into little robots - skittles for the big kids, baby puffs for the little ones. The kids really loved taking them home!
The only baby showers I've ever hosted have been for girls. As much as I would love to change it up and do one for a boy, I have to say any kind of "pink" theme is relatively easy. My typical menu is full of finger foods - people are already into the "little stuff is cute" vibe, so that's easy. My go-to menu: chicken salad on croissants, little finger sandwiches, pinwheels, fruit and yogurt parfaits, antipasto skewers, etc. All of these are easy to prepare, and most of it can be prepped the night before. One of my favorite party elements: a dessert table. This has a double function for me (cheers to that!) because it obviously provides desserts for the guests, but it can also work as your party favors. All you need are some cute carrying boxes (see the bottom of the pic), and after your guests eat dessert, they can load up additional treats and take them home (hi-five on getting it out of your house so you don't eat it all later that night after clean up). If you don't have one large table to use, you can break it up by using several smaller tabletops. Easy party hack: I know everyone is obsessed with cake pops, but marshmallow pops are WAY easier, and kids seem to love them just as much. You literally just take a marshmallow (you can buy pink ones too!) and dip it in melted chocolate. Put a variety of sprinkles on - done. Then I used this leftover melted chocolate, along with pink candy melts, to drizzle on an assortment of other store-bought desserts. It such a fast/easy way to make an assortment of pink treats, but it looks like you spent hours making a bunch of different desserts. Shhhhh.... our secret. :)
Welcome to my blog. Please keep in mind my technical skills are at about a 2%, but hopefully this site will be more painful for me than it is for you.
I'm just getting started, so hang in there as I start making posts (and any constructive feedback/technical advice would be greatly appreciated! :) My goal is to make this blog easy to follow depending on your interest here, since I have two main loves to blog about: writing/editing/reviewing novels and party planning. You'd think I could just settle on one, but I just can't do it. So I apologize now for any confusion. With that said, thanks for reading this far... and good luck (that's mostly directed at myself :). |
AuthorI love writing romance novels, editing other people's novels, planning parties (heavy on the theme food!) and watching movies. Cooking has also become a passion of mine (because you can't have a proper party without food!) and I love finding new hobbies when I can squeeze them in. Archives
December 2020
Categories |